
Why Claude Code feels different
Claude Code is not just a chat window that answers questions. Its practical value comes from being able to read a working project, inspect files, modify code, connect to outside tools, and carry a task from idea to deployment. That changes the way you should use it. If you approach it like a normal chatbot and type “build me an app,” it will fill in many missing details on its own. Some of those guesses will be fine, but others will push the project in the wrong direction and create rework.
A better mental model is this: Claude Code is a collaborative execution environment. You define the outcome, constraints, and quality bar. It handles planning, coding, tool use, and refinement. The more concrete your operating instructions are, the better the output quality and the lower your token waste.
This tutorial walks through that operating model from first launch to deployment.
What you need before you start
You need the Claude desktop app with access to the Code tab. In the source material, the workflow assumes at least a Pro subscription. You also need a local workspace where Claude can inspect and edit files. If you plan to publish a build, prepare a deployment target in advance; the example in the source uses Vercel.
Practical setup checklist before your first prompt:
- Install and open the Claude desktop app.
- Confirm you can access the
Codetab. - Open or create a project folder instead of chatting in an empty session.
- Sign in to any external services you expect Claude to use later, such as Vercel or a workflow platform.
- Decide whether your session is exploratory, implementation-focused, or deployment-focused, because that affects model and effort choices.
A common beginner mistake is starting in the interface before deciding what the deliverable should be. Write down the target first: for example, “a task management app with drag-and-drop columns, workload indicators, and mobile-friendly layout.” That single sentence gives you a reference point for every later prompt.
Choose the model like an engineer, not like a shopper
The source explains three practical modes:
Sonnetfor most day-to-day work.Opusfor deeper reasoning, architecture, and stubborn debugging.- A hybrid planning/execution path, where deeper reasoning is used for planning and a faster model is used for execution.
The important lesson is not the marketing label. It is workload matching.
Use Sonnet when you already know what to change and need speed. Typical cases:
- Rename or restructure UI text.
- Add a form field.
- Fix a styling issue.
- Refactor a small component.
- Implement a simple API call.
Use Opus when the problem is ambiguous, interdependent, or failure-prone. Typical cases:
- A bug spans several files and you do not know the root cause.
- You need a new application structure and want Claude to compare options.
- A feature depends on state management, validation, permissions, and deployment decisions together.
- Previous prompts produced plausible but incorrect implementations.
A reliable operating pattern is:
- Start with the faster model for exploration and small changes.
- Switch up only when the task requires deeper reasoning.
- Switch back down after the architecture is settled.
This reduces cost and keeps iteration speed high.
Control reasoning depth with effort settings
The source highlights the /effort control. That is one of the most practical levers because it changes how much reasoning Claude applies before responding.
Treat the levels as a budget tool:
Low: tiny edits, formatting, copy changes, quick checks.Medium: balanced implementation work.High: default for meaningful feature work.Max: only for the hardest reasoning tasks.
A useful rule is to match effort to the cost of being wrong. If a typo fix is wrong, you can correct it in seconds, so low effort is fine. If Claude is about to redesign a data flow or diagnose a broken deployment, the cost of a shallow answer is much higher, so increase effort.
Example prompt for a hard task:
Use high effort. Inspect the current project structure, identify why task cards are not updating after drag-and-drop, explain the likely root cause, then propose the smallest safe fix before editing code.
Example prompt for a simple task:
Example: Use low effort. Change the dashboard warning badge from yellow to amber and keep all existing behavior unchanged.
The pitfall is leaving effort too high for everything. That slows the loop, increases usage, and creates overthinking on simple tasks.
Stop prompting vaguely: plan first, then build
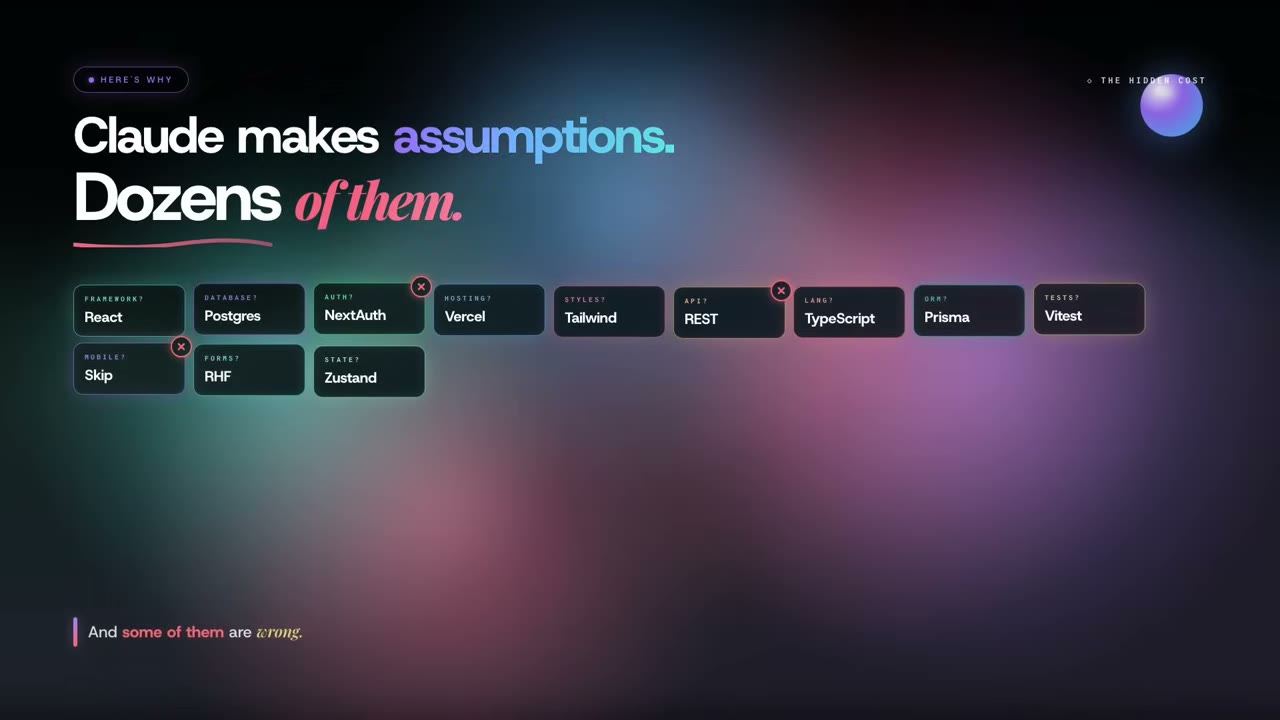
One of the strongest ideas in the source is that most bad Claude Code sessions begin with underspecified prompts. Claude is capable, but if you give it an abstract request, it will invent missing requirements.
Instead of asking for an app immediately, give it a planning brief first. In practice, this should include:
- Goal: what should exist when the task is complete.
- Users: who uses it.
- Core workflows: what those users must do.
- Constraints: tech stack, style, deployment target, libraries to prefer or avoid.
- Quality rules: responsiveness, accessibility, error handling, testing expectations.
A strong planning prompt might look like this:
Plan mode. I want a lightweight team task dashboard for 5 to 20 users. Required features: task list, Kanban columns, workload summary, overdue warnings, and mobile usability. Use a modern web stack that is simple to deploy to Vercel. Do not write code yet. First propose the architecture, file structure, data model, and an implementation order with tradeoffs.
Why this works:
- It asks for a plan before code.
- It defines scope.
- It names required outputs.
- It adds constraints.
- It reduces hidden assumptions.
Once the plan looks good, your next prompt should approve or adjust it. For example:
Proceed with the proposed architecture, but keep data local for the first version and optimize for a clean mobile interface.
This two-step pattern is much more stable than “build it.”
Use Plan mode to expose assumptions early
Plan mode matters because it turns Claude into a design partner before it becomes an implementer. In planning, you are looking for missing assumptions, not polished code.
Ask questions such as:
- What is the simplest architecture that still supports deployment?
- Which features belong in version one versus later iterations?
- Where might state management become complex?
- What data should be mocked now and integrated later?
- What will be hardest to test or debug?
A practical review checklist for any Claude-generated plan:
- Does the plan name the files or modules likely to be created?
- Does it explain why a framework or stack was chosen?
- Does it identify deployment implications?
- Does it define how the app will store state or data?
- Does it separate must-have features from nice-to-have features?
If the answer to any of those is no, refine the plan before coding starts.
Iterate from a first result instead of restarting
After Claude produces a first working result, many users throw the work away and start over whenever something is imperfect. That is usually wasteful. A better approach is controlled iteration.
When you see the first build, evaluate it in layers:
- Does the core workflow exist?
- Does the structure make sense?
- Are the main interactions usable?
- What is missing or wrong?
- What should be changed without breaking what already works?
Then prompt precisely against the current state.
Bad iteration prompt:
This is not right. Try again.
Good iteration prompt:
Keep the current task board layout, but make three changes: add a workload summary panel, flag overloaded team members in red, and show delayed tasks with a yellow warning indicator. Preserve the existing drag-and-drop behavior.
This style protects working parts of the system and narrows the change surface.
Another useful technique is to ask Claude to explain its own implementation before editing it further:
Before making changes, summarize how workload status is currently calculated and which files control the warning colors.
That forces alignment and often exposes whether Claude actually understands the current codebase.
Create a durable project brain with CLAUDE.md
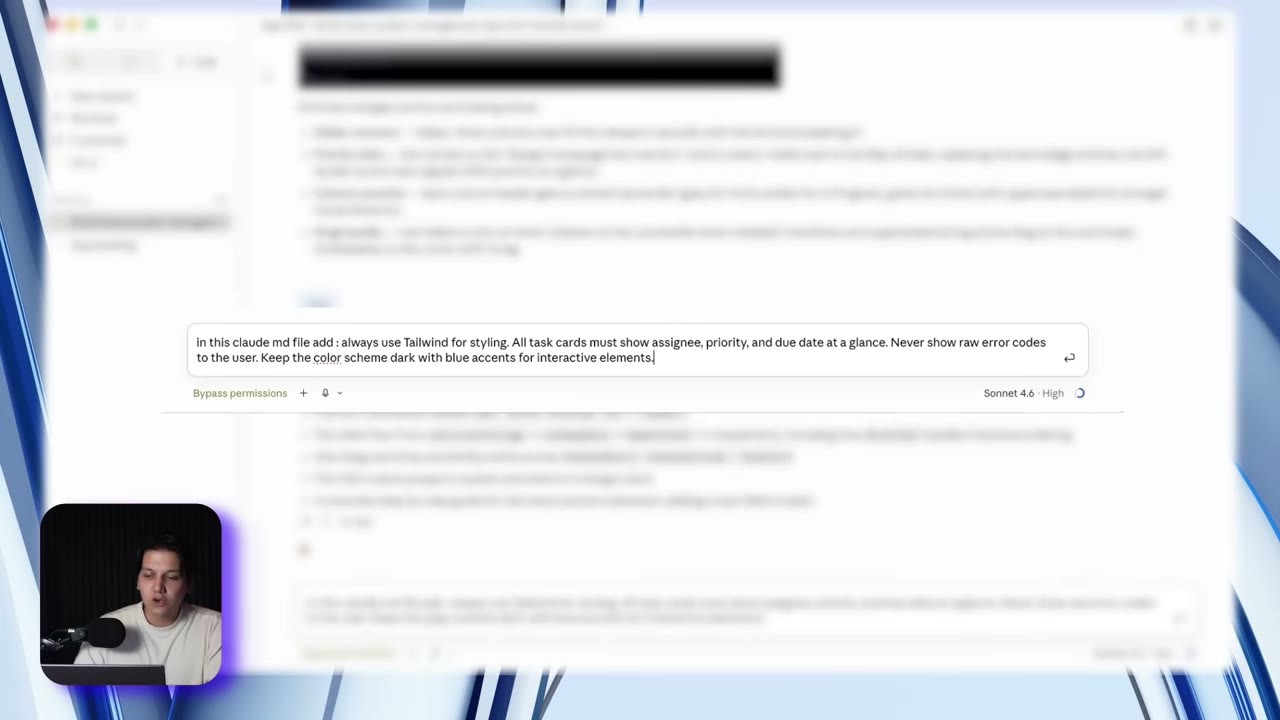
The source emphasizes CLAUDE.md, and that is one of the highest-leverage habits for repeated work. Think of CLAUDE.md as project-level operating memory. Instead of restating the same preferences every session, you store them once in a file Claude can reference.
Useful content for a CLAUDE.md file includes:
- Product purpose and target users.
- Approved tech stack.
- Coding conventions.
- UI design principles.
- Testing expectations.
- Deployment target.
- Commands to run.
- What to avoid.
Example structure:
# Project Rules

## Purpose
A mobile-friendly internal task dashboard for small teams.

## Stack
Next.js, TypeScript, Tailwind, local JSON or lightweight database for early versions.

## UI Rules
Clean, minimal, responsive, high readability, no unnecessary animation.

## Engineering Rules
Preserve existing file naming, explain major structural changes before making them, and prefer small safe edits.

## Deployment
Target Vercel. Ensure production build passes before suggesting deployment complete.
Two levels of customization matter:
- Project-level instructions for one repository.
- Global preferences that apply across projects.
Use project rules for anything tied to one codebase. Use global rules only for personal defaults you want everywhere.
The pitfall is stuffing CLAUDE.md with vague philosophy. Keep it operational. If a sentence does not change a technical decision, it probably does not belong there.
Connect real tools with MCP instead of faking integrations
The source introduces MCP, or Model Context Protocol, as the bridge that lets Claude talk to external tools. This is where a prototype can become an operational system.
Instead of manually typing task data into an app, MCP lets Claude connect with services your team already uses, such as automation platforms, spreadsheets, Git repositories, APIs, or databases.
Typical reasons to add MCP:
- Pull data from a real source instead of mock content.
- Trigger workflows when something changes.
- Read or write information across tools.
- Turn Claude from “code generator” into “workflow-connected builder.”
Based on the source, the setup pattern is simple:
- Open customization or connector settings.
- Add a custom connector.
- Paste the connector link or endpoint.
- Confirm the connection.
- Prompt Claude to use the connected tool for a specific task.
Practical example workflow:
- Your app tracks tasks.
- An automation platform receives new tasks from a form.
- Claude uses MCP to connect that platform.
- Claude helps define the integration logic.
- The app displays fresh task data without manual entry.
A key pitfall: do not connect a tool before deciding what the tool should do in the workflow. “Connect Slack” is not a requirement. “Post a message when a task becomes overdue” is a requirement. Define the trigger, action, and expected output first.
A strong MCP prompt might be:
Use the connected automation tool to create a workflow that triggers when a new project task is submitted, normalizes the task fields, and sends the task into the app's task store. Explain the required fields and error handling before implementing.
Manage context before Claude gets confused
As projects grow, context quality becomes a bigger risk than model quality. Claude can reason well, but if the session is overloaded with outdated directions, redundant prompts, and half-finished branches of thought, output quality falls.
Context management means deciding what Claude should keep in focus and what should be restated or removed.
Use these habits:
- Keep one task objective per prompt whenever possible.
- Ask Claude to summarize the current implementation before major changes.
- Move durable rules into
CLAUDE.mdinstead of repeating them in chat. - Re-anchor the conversation after several large iterations.
- Avoid combining bug fixing, redesign, deployment, and integration in one vague request.
Example re-anchoring prompt:
Pause implementation. Summarize the current state of the app, list the unfinished items, and recommend the next highest-value step. Do not edit files yet.
This is especially useful after a long session. It prevents drift and helps you decide whether to continue, branch, or start a fresh focused thread.
The source also mentions extended thinking. The practical reading is simple: when the task has multiple dependencies or hidden logic, give Claude more room to reason. When it does not, keep the loop short.
Turn a local prototype into a live app
One of the most valuable workflow upgrades in the source is deployment. Many tutorials stop at “it works on my machine.” That is not enough if your goal is collaboration.
The example deployment target is Vercel. The important lesson is that Claude can help carry the project through deployment steps, not just code generation.
A practical deployment request:
Deploy this project to Vercel and return a shareable live URL. Before deploying, verify the production build requirements and identify anything that will fail in deployment.
Before you issue that prompt, check these items manually or ask Claude to check them:
- Does the app build successfully in production mode?
- Are required environment variables defined?
- Are local-only paths or secrets hardcoded anywhere?
- Are API endpoints using the correct production URLs?
- Are assets and dependencies declared correctly?
- Is mobile responsiveness acceptable for first users?
Common deployment pitfalls:
- The app works locally because of a missing environment variable that exists only on your machine.
- Mock data is embedded in a way that breaks production rendering.
- Build commands are not defined clearly.
- A server-side dependency is imported into client code.
- The preview looks correct, but production routing is misconfigured.
After deployment, test like an operator, not like a creator:
- Open the live URL in a private browser window.
- Test the main workflow on desktop.
- Test the main workflow on mobile.
- Check loading states and empty states.
- Confirm any integrations still work outside the development environment.
Use Skills to make quality repeatable
The source describes Skills as reusable instructions that Claude can load when relevant. Operationally, this means you can encode preferred ways of working once and stop re-explaining them every session.
Good Skill candidates include:
- Frontend component conventions.
- Commit formatting rules.
- Testing standards.
- Review checklists.
- Design system constraints.
- API integration patterns.
What makes a Skill valuable is specificity. “Write clean code” is not a usable skill. “When editing React components, preserve prop types, avoid unnecessary state, and run tests for the affected module” is usable.
If you create or install Skills, audit them periodically. Poorly written Skills can over-constrain Claude or apply outdated project assumptions.
Use Hooks to automate local guardrails
Hooks are behavior-triggered automations. They are valuable because they convert good intentions into automatic enforcement.
Examples mentioned in the source include:
- Auto-format after file edits.
- Send a notification after task completion.
- Run tests when a new component is created.
A sensible beginner strategy is to start with low-risk Hooks:
- Formatting on file change.
- Linting on task completion.
- Test execution on specific file categories.
Avoid aggressive Hooks too early. If every tiny action triggers expensive checks, your loop becomes slow and frustrating. Start with guardrails that catch common breakage without blocking iteration.
Use Routines for scheduled background work
Routines run in the cloud rather than on your local machine. Their value is that they move maintenance work off your active schedule.
Examples from the source:
- Review pull requests overnight.
- Triage a bug list every Monday morning.
- Check documentation weekly and flag outdated content.
This is especially useful for recurring operational tasks that are important but easy to postpone.
A good Routine has three properties:
- A clear schedule.
- A precise scope.
- An explicit output.
For example, “review every pull request” is too broad unless you define what counts as review output. Better:
Every weekday at 8 AM, inspect open pull requests, summarize changed areas, flag missing tests, and post a short risk note.
The source notes usage limits by plan. That means you should reserve Routines for work that truly benefits from scheduled automation rather than ad hoc prompting.
A practical end-to-end operating pattern
If you want a stable Claude Code workflow, use this sequence:
- Define the outcome in one sentence.
- Open Plan mode and ask for architecture, files, and tradeoffs.
- Approve or refine the plan.
- Set the appropriate model and effort level.
- Implement the first version.
- Iterate with precise deltas instead of vague dissatisfaction.
- Store durable rules in
CLAUDE.md. - Connect real systems through MCP when the app needs real data or actions.
- Re-anchor context after several rounds of changes.
- Deploy only after checking production requirements.
- Add Skills, Hooks, and Routines once the workflow proves valuable.
This sequence is simple, but it prevents most beginner mistakes.
Configuration decisions that pay off later
Several small decisions make later sessions much smoother:
- Keep one repository per clear project goal.
- Name prompts by outcome, not by activity.
- Prefer explicit constraints over stylistic adjectives.
- Ask Claude to explain before major rewrites.
- Separate version-one scope from future ideas.
- Treat deployment as part of the feature, not an afterthought.
Examples of good constraints:
- “Use a stack that deploys cleanly to Vercel.”
- “Preserve the current drag-and-drop board and add analytics beside it.”
- “Do not introduce a database yet.”
- “Optimize for mobile readability before adding animation.”
Examples of weak constraints:
- “Make it modern.”
- “Make it nicer.”
- “Use the best framework.”
- “Improve everything.”
Claude responds better to constraints that can be verified.
Final operational checklist
Use this before ending a Claude Code build session:
- The goal of the app is still explicit and unchanged.
- The chosen model matches the difficulty of the current task.
- The effort level matches the cost of being wrong.
- The current plan has been reviewed before major code generation.
- The latest iteration prompt names exactly what should change and what must stay.
- Durable project rules have been moved into
CLAUDE.md. - External tools are connected only where they support a defined workflow.
- The conversation has been re-anchored if the context became messy.
- Production build risks have been checked before deployment.
- Skills, Hooks, or Routines have been added only where they reduce repeated manual work.
- The live app has been tested from a real user perspective after deployment.
Source attribution
This article was written from the YouTube tutorial asset: “Claude Code Tutorial: Beginner to Advanced in 20 Minutes” by Zinho Automates. Source URL: https://www.youtube.com/watch?v=ujHXnlSVheI