
Local agentic coding has moved beyond novelty. If your goal is private code assistance, lower recurring cost, predictable latency, and the ability to wire AI into your own editor and terminal stack, a local workflow is now genuinely viable. The catch is that most failures do not come from installing the software. They come from choosing the wrong model for your hardware, misunderstanding quantization, overestimating context, or connecting tools to the wrong endpoint.
This guide walks through a practical setup centered on LM Studio: download and run local models, size them correctly for your GPU or unified memory, expose an OpenAI-compatible API, and connect that API to tools such as Continue in VS Code, GitHub Copilot-compatible chat flows, and Pi-style terminal agents. The point is not just to make a model answer prompts. The point is to make it useful for real coding work.
Start With The Hardware Reality
Before you choose any model, you need a simple mental model of what the machine can sustain.
A local model is constrained by three factors:
- Available VRAM or usable unified memory. This determines whether the model can stay resident in fast memory.
- Model size. Usually discussed in parameter count and actual quantized file size.
- Context window. More context means more memory pressure and usually slower operation.
In practice, the most important rule is straightforward: if the full working model fits in GPU-accessible memory, the experience improves dramatically. Once a model spills too much into slower system memory, you can still run it, but latency climbs and agentic workflows become noticeably less pleasant.
For Macs with unified memory, you get more flexibility because GPU and system memory are shared, but that memory is still finite and actively used by the OS, editor, browser, terminals, and build tools. Do not size your model as if 100% of advertised memory is free.
A good operational rule:
- Reserve memory for your editor, browser, terminal, and build chain first.
- Leave headroom for context growth.
- Avoid selecting a model that only barely fits on paper.
If your machine is near the limit, a slightly smaller model that stays fully resident is often more useful than a larger model that thrashes memory.
What Actually Matters When Choosing A Model
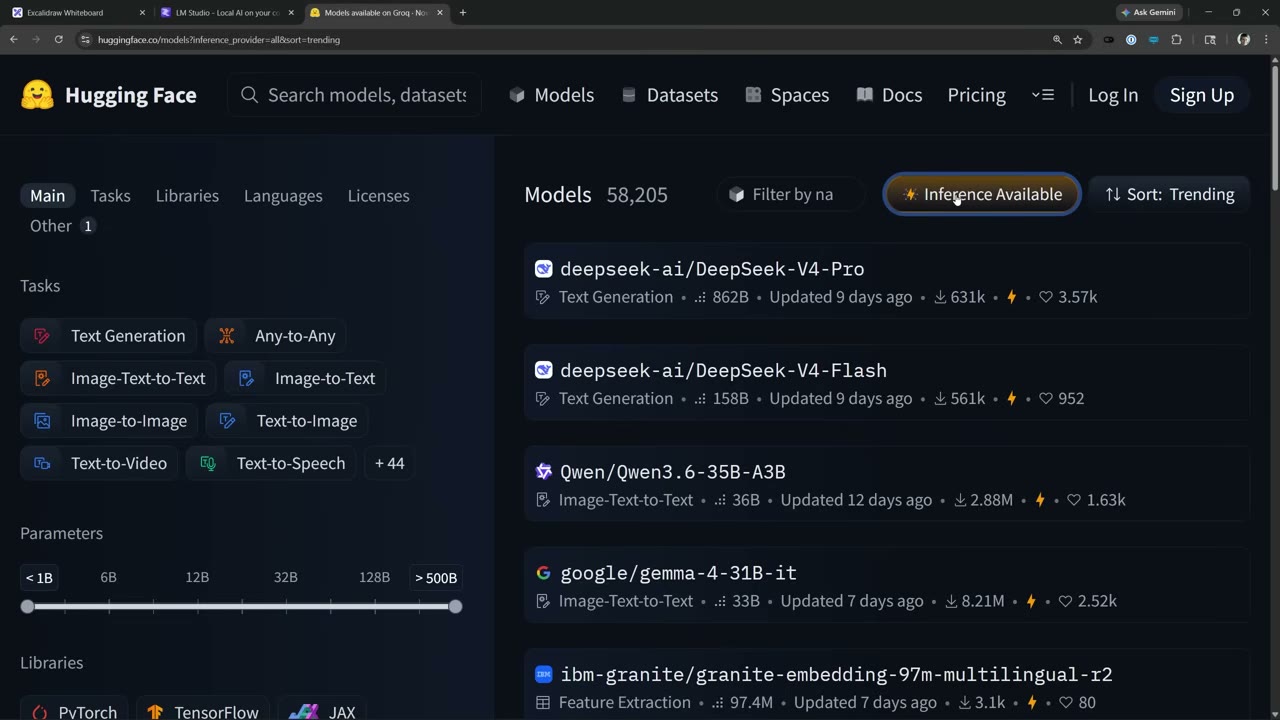
When developers compare local models, they often fixate on parameter count alone. That is not enough. For coding workflows, evaluate five properties together.
1. Parameter count
More parameters often correlate with stronger reasoning and broader capability, but they also demand more memory and usually more latency. Bigger is not automatically better if it makes the workflow too slow for autocomplete or iterative agent steps.
2. Quantization level
Quantization is what makes local deployment practical. A quantized model stores weights in a more compact form, reducing memory usage at some cost to quality.
Common intuition:
- Lower-bit quantization means smaller size and easier deployment.
- Higher-bit quantization usually preserves more quality.
- For many local coding setups, Q4 is the pragmatic starting point.
That is why Q4 variants are often a safe default when you are still testing what your hardware can handle. Move upward only if you have headroom and a clear quality gain. Move downward only if you are missing latency targets or cannot fully load the model.
3. Context window
A larger context window helps with long files, multiple files, repo-wide instructions, tool traces, and agent loops. But a huge context setting is not free. It costs memory and can slow generation.
Practical rule:
- Use enough context for your real tasks, not the maximum number printed on a model card.
- For day-to-day code editing, moderate context is often enough.
- For repo-level agents, long traces, or multi-file refactors, favor models that handle larger context reliably.
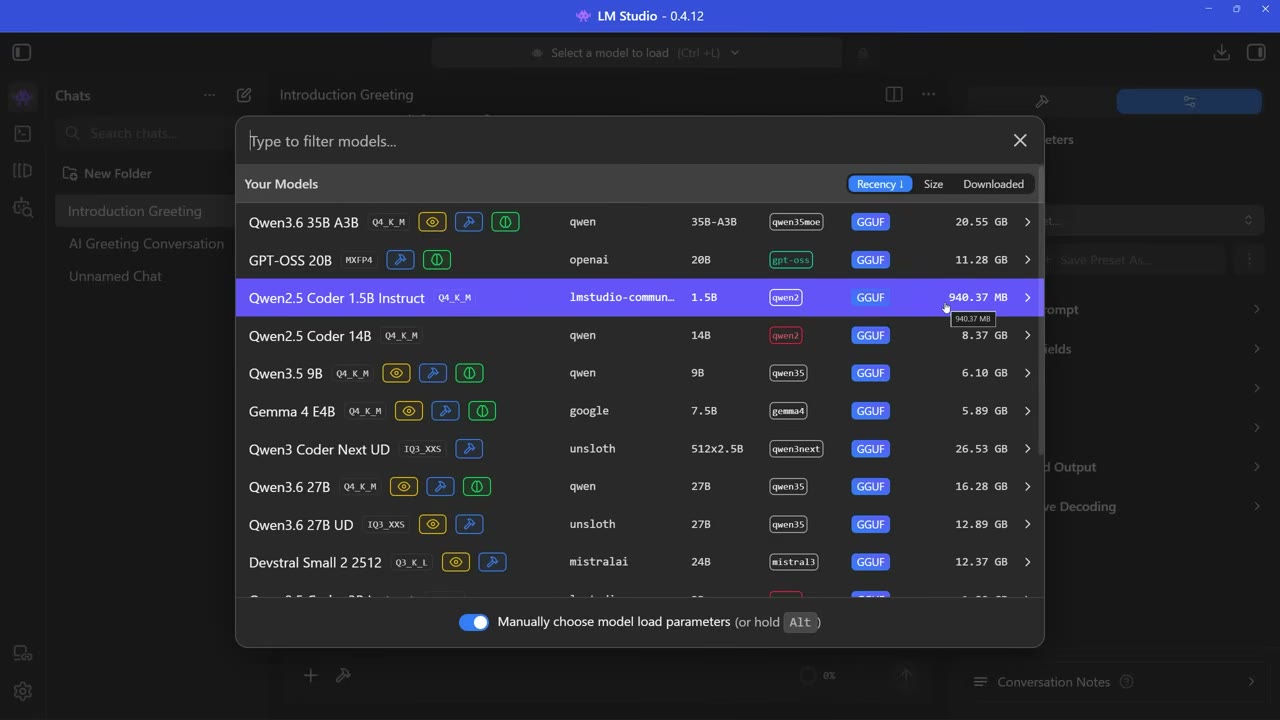
4. Capability flags
For agentic coding, a model should ideally support:
- Tool use for structured function/tool calling.
- Reasoning for harder step-by-step tasks.
- Vision only if you need screenshots, diagrams, or UI image inspection.
If the model lacks reliable tool use, it may still be usable for chat or simple inline coding help, but it becomes a weak choice for agent loops that depend on structured calls.
5. Intended role in your workflow
Do not force one model to do everything. Local workflows often improve when you split responsibilities:
- A smaller, faster model for autocomplete.
- A stronger reasoning/tool model for chat and agent tasks.
- An optional vision model for screenshots or design debugging.
A Simple Decision Framework For Model Selection
Instead of asking “what is the best local model?”, use these rules.
Choose a smaller model when:
- Your GPU memory is limited.
- You care about fast autocomplete more than deep reasoning.
- You want low friction in editor interactions.
- You often run browser tabs, Docker containers, tests, and dev servers at the same time.
Choose a larger model when:
- You mainly want refactoring help, repo understanding, or longer reasoning chains.
- The entire model still fits comfortably in fast memory.
- You can tolerate slower generation in exchange for better planning and tool decisions.
Choose a lower quantization when:
- The model will not fit otherwise.
- Speed matters more than top-end quality.
- You are building a first local setup and need reliability before optimization.
Increase context when:
- The agent needs long instructions, tool traces, or multiple files.
- You frequently work with large codebases or long prompts.
Reduce context when:
- Loading fails or memory use becomes unstable.
- Latency is too high for interactive development.
- The quality gain from more context is not visible in real tasks.
A blunt but useful heuristic: the best local coding model is the strongest one that remains consistently fast in your actual workflow. Benchmarks matter less than the model that still feels responsive after opening VS Code, browser devtools, terminals, and your running app.
Installing LM Studio And Preparing The Runtime
LM Studio is one of the most approachable ways to run local models because it combines model discovery, local inference, and a developer-facing OpenAI-compatible server in one interface.
Basic setup sequence:
- Install LM Studio.
- Enable developer-facing features if they are not visible by default.
- Browse or import models.
- Download a coding-capable model that matches your hardware.
- Load the model and confirm it is using GPU acceleration or the best available hardware path.
- Test a local inference session before wiring it into other tools.
Two practical mistakes happen early:
- Developers download the largest model they recognize instead of the largest model they can run well.
- Developers load multiple models at once and accidentally consume all available GPU memory.
If your machine is close to the edge, start with one chat/agent model and add an autocomplete model later.
Configuring Models In LM Studio Without Guesswork
Once a model is downloaded, the next job is configuration discipline.
Focus on these controls:
Memory placement
Prefer configurations that keep the working set on GPU-accessible memory. Partial offload can work, but the user experience changes sharply when too much moves off the fast path.
Context size
Set context intentionally. Bigger is not always smarter. Bigger often just means heavier.
Generation settings
For coding tasks, avoid overly creative settings. Stability matters more than stylistic variation. If you see inconsistent completions, malformed tool calls, or wandering outputs, reduce randomness.
Persistent profiles
If LM Studio supports remembered load settings, use them. Reproducibility matters. Once you find a stable configuration for a specific model, keep it consistent across sessions.
Exposing OpenAI-Compatible Endpoints
One of the strongest reasons to use LM Studio is that it can expose OpenAI-compatible endpoints. This is the bridge that turns a local model from an isolated app into part of your toolchain.
That compatibility layer matters because many coding tools already know how to talk to OpenAI-style APIs. Once your local server exposes the expected base URL and endpoints, the rest of the stack becomes mostly configuration work.
Typical connection information you need:
- A local base URL such as
http://localhost:<port>/v1 - A model identifier exactly matching the loaded model or alias
- A placeholder API key if the client requires one
Important pitfall: many clients assume a cloud endpoint by default. If requests seem to leave your machine or fail silently, verify the configured base URL, not just the model name.
Another common pitfall is model mismatch. The client may point to a model name that exists in your config but is not actually loaded in LM Studio. In local setups, “configured” and “currently resident” are not always the same thing.
Wiring Local Models Into VS Code With Continue
For many developers, the first real productivity win comes from Continue inside VS Code. It gives you a practical path to editor chat, agent-like interactions, and autocomplete backed by your own local model.
The high-level setup is simple:
- Install the Continue extension.
- Open its configuration/settings area.
- Add a provider using the OpenAI-compatible LM Studio endpoint.
- Assign models by task role.
- Test chat first, then autocomplete.
The role split matters.
Use one model for chat/agent reasoning and another for autocomplete if your hardware allows it. Autocomplete benefits from a smaller, faster model because the threshold for “feels instant” is much stricter than chat.
Settings that deserve attention:
- Autocomplete timeout: if too short, completions will feel inconsistent because the suggestion arrives too late to render predictably.
- Debounce: if too aggressive, the tool fires constantly; if too slow, the editor feels laggy.
- Model assignment: do not accidentally point autocomplete at the heavier reasoning model unless you have measured that it is still responsive.
A practical default mindset:
- Increase timeout modestly if completions appear unreliable.
- Keep debounce low enough for flow, but not so low that the system churns on every keystroke.
- Start conservative, then tune after observing actual latency.
The biggest mistake here is trying to force one large reasoning model to handle both tool chat and inline completion. That works on stronger hardware, but on limited machines it usually degrades the entire experience.
Using Local Models In GitHub Copilot-Style Workflows
Even if your day-to-day interface is GitHub Copilot, the core concept remains the same: the integration succeeds only if the tool can speak to an OpenAI-compatible backend or a configurable local provider path.
What matters operationally is not branding but compatibility.
Check these items:
- Can the feature use a custom base URL?
- Can you specify the model name?
- Does it require a key even for local traffic?
- Does the feature assume remote-only authentication or policy checks?
In some cases, chat-like features are easier to redirect than deeper platform-native workflows. If a specific Copilot path does not behave well with a local backend, keep local models for the parts that are configurable and leave the more locked-down features on cloud providers.
This hybrid approach is often the most practical rather than the most ideological.
Using Pi Or Terminal Agents Against A Local Endpoint
Terminal-based coding agents become much more flexible when they can target a local OpenAI-compatible server.
The pattern is always similar:
- Point the agent to the LM Studio base URL.
- Provide the local model name.
- Supply an API key if the client library insists on one.
- Confirm tool calling works before running large tasks.
For agentic coding, you should validate four things before trusting the setup on a real repository:
- The model accepts long-enough prompts without truncation.
- The model supports tool use in a stable format.
- The agent handles local latency without timing out.
- The model can recover from tool output and continue the loop coherently.
If an agent repeatedly fails after tool calls, do not immediately blame the agent framework. The real issue is often one of these:
- The selected local model does not actually support robust tool calling.
- The context is too small for the loop.
- Generation settings are too noisy.
- The model is memory-starved and becomes unstable under longer traces.
Where Local Models Are Already Good Enough
Local models are not just a privacy play. In several coding tasks, they are already operationally sufficient.
Use local-first when you need:
- Boilerplate generation.
- Fast autocomplete and local refactors.
- Rewriting or explaining code already in the repo.
- Test scaffolding.
- Iterative shell-command assistance.
- Low-risk agent loops over a constrained codebase.
- Privacy-sensitive work that should stay on-device.
Local models shine especially when the problem is narrow, the codebase context is manageable, and turnaround speed matters more than frontier-level reasoning.
They also work well when you want predictable availability. No rate-limit surprises, no API billing anxiety, and no dependency on external service uptime.
Where Cloud Models Still Win
A mature workflow is not “local only at any cost.” It is “local where it is sufficient, cloud where it is materially better.”
Prefer cloud models when you need:
- Complex architectural planning across large repositories.
- Long, precise reasoning chains with fewer retries.
- Higher-quality tool calling on hard tasks.
- Advanced multimodal interpretation.
- Team workflows that depend on shared hosted infrastructure.
- Stronger reliability under long contexts and multi-step execution.
A practical routing policy for real teams:
- Send autocomplete and routine edits to local models.
- Send medium-complexity chat and constrained agents to local first.
- Escalate to cloud for cross-service refactors, vague debugging, large migrations, or when repeated local retries are costing more time than the API would.
That decision rule preserves privacy and cost where possible without romanticizing local inference beyond its current strengths.
Common Configuration Pitfalls
Most local agentic coding setups fail for mundane reasons.
Pitfall 1: Choosing by benchmark instead of responsiveness
A slower “smarter” model often produces worse real productivity than a slightly weaker model that responds quickly enough to stay in your editing loop.
Pitfall 2: Ignoring tool-use support
If the model is meant for agentic workflows, tool use is not optional. Chat strength alone does not guarantee structured agent performance.
Pitfall 3: Oversizing context from day one
A giant context setting can sabotage a perfectly good setup. Start with what you need, then scale carefully.
Pitfall 4: Loading too many models simultaneously
Running a chat model, autocomplete model, and vision model together sounds attractive until your GPU memory disappears.
Pitfall 5: Assuming all OpenAI-compatible clients behave identically
They do not. One client may require a dummy key, another may insist on a specific path suffix, and another may silently default to a cloud URL unless every field is overridden.
Pitfall 6: Expecting local and cloud models to fail in the same way
When local models struggle, you often see degraded consistency before outright failure: shorter useful completions, weaker tool arguments, more drift after long traces, or sudden latency spikes.
An Operational Checklist For A Stable Local Coding Stack
Use this checklist before you call the setup finished.
- Confirm how much VRAM or usable unified memory is truly available during normal development, not on an idle desktop.
- Pick a model that fits with safety headroom.
- Start with a Q4-class quantization unless you have a reason to change.
- Verify the model supports tool use for agent workflows.
- Keep context moderate at first.
- Load one model, test it, then add secondary models.
- Expose the LM Studio OpenAI-compatible endpoint and record the exact base URL.
- Match the client model name to the loaded model name.
- Test chat before autocomplete; test autocomplete before full agents.
- Tune timeout and debounce based on observed latency, not guesswork.
- Run one real repo task end-to-end before declaring the setup production-ready.
- Decide in advance which tasks route local and which escalate to cloud.
Recommended Workflow Architecture
If you want one practical default architecture, use this:
- Local small model for autocomplete.
- Local stronger reasoning/tool model for editor chat and terminal agents.
- Cloud fallback for high-complexity tasks, large-context reasoning, or critical refactors.
This is the setup that usually delivers the best balance of privacy, speed, cost control, and reliability.
Trying to make one single local model cover every scenario is usually the wrong optimization target. A layered workflow is more resilient.
Final Takeaway
The most effective local agentic coding workflow is not built by chasing the biggest model. It is built by matching model size, quantization, context, and capability to the exact job being done.
LM Studio is useful because it reduces the friction between local inference and developer tooling. Once it exposes an OpenAI-compatible endpoint, your editor and terminal tools can treat your machine like a private model provider. From there, the real leverage comes from discipline: choose the right model for the role, keep the configuration reproducible, and use cloud models only when they clearly outperform the local path.
That is the difference between a demo and a workflow you will still want to use next month.
Source attribution: Based on the tutorial video “The Best Local Agentic Coding Workflow (Complete Guide)” by Web Dev Simplified, published on May 12, 2026. URL: https://www.youtube.com/watch?v=UngVdAsQEiU